A Coat Rack That Holds Wet Coats
 Callum Reith-Sowande
Most folks think you need a workshop full of expensive, vibrating power tools to make something decent, but they’re dead wrong. I spent forty years on site watching lads rush through a job with a circular saw, only to end up with splintered edges and a piece of kit that looks like it was chewed by a dog. If you want to learn how to build a coat rack that actually lasts, you don't need more electricity; you need a steady hand and a chisel that can actually shave a hair. I remember my first proper project back in my apprenticeship—I tried to brute-force a joint with a dull blade and ended up ruining a perfectly good piece of oak. That was the day I learned that patience and a sharp edge beat a loud motor every single time.
In this guide, I’m going to show you the proper, unhurried way to get the job done. I won't be feeding you any of that modern, disposable nonsense; instead, I’ll walk you through selecting the right timber, making clean joinery, and ensuring every connection is built to endure.
Guide Overview
Tools & Supplies
- Drill and bits for making pilot holes and driving screws
- Sandpaper for smoothing rough wood edges
- Measuring tape for precise cuts and placement
- Level to ensure the rack is straight
- Wood board (1x4 or 1x6) for the base and uprights
- Wooden pegs or metal hooks for hanging items
- Wood screws for assembly
- Wood glue for extra joint strength
- Wood stain or paint for finishing
Step-by-Step Instructions
- 1. Start by picking your timber. Don't go grabbing some cheap, soft pine from the big-box DIY store if you can help it; it’ll just splinter and fight you. I prefer a bit of oak or even a decent piece of ash. Once you've got your wood, mark out your lengths with a sharp pencil. If you want a simple wall-mounted rack, you'll need a sturdy backboard and a few smaller pieces for the pegs. Remember, measure twice and cut once, though I usually prefer to measure once and check it three times before I even touch the saw.
- 2. Now, it's time to get to the cutting. Forget that loud, vibrating jigsaw for a moment; grab a well-honed tenon saw or a fine-tooth hand saw. You want to follow your pencil lines with a steady hand. If your saw is sharp, it should practically draw itself through the grain without you having to lean your weight into it. Take your time with the end grain—if you rush it, you'll end up with a ragged edge that no amount of sanding will ever truly fix.
- 3. Once your pieces are cut, you need to prepare the pegs. If you're making them from scratch, take a piece of square stock and use a sharp chisel to taper the ends. This is where people usually fail; they try to use a sander to shape the wood, but a sander just rounds off the edges indiscriminately. Use your chisel to slice the fibers away cleanly. A clean cut from a sharp blade leaves a surface that's smoother than anything a machine can manage.
- 4. Next, we need to join the pegs to the backboard. I don't care much for those fancy modern glue-and-screw methods that fail the moment the wood expands in the winter. I like to drill a pilot hole slightly smaller than the peg, then use a bit of wood glue and a very small finishing nail to seat it. If you've done your chiseling right, the peg should sit snug and true against the backboard without any wobbling.
- 5. Now comes the part everyone tries to skip: the smoothing. You'll be tempted to reach for the electric orbital sander, but I'm telling you, put it away. A hand plane—a real, well-tuned smoothing plane—will do a much better job. Run it along the face of your backboard to knock off any high spots and bring out the natural character of the grain. A plane doesn't just remove material; it leaves a finish that feels like silk under your hand.
- 6. Finally, give the whole thing a bit of protection. I'm not a fan of those thick, plastic-looking polyurethane coatings that sit on top of the wood like a layer of varnish on a cheap car. Instead, use a bit of linseed oil or a beeswax finish. Rub it in with a clean rag, let it soak in, and then buff it out. It’ll protect the wood while letting it breathe and age naturally, which is exactly how a good piece of furniture ought to behave.
Selecting Woodworking Tools for Beginners Who Value Precision
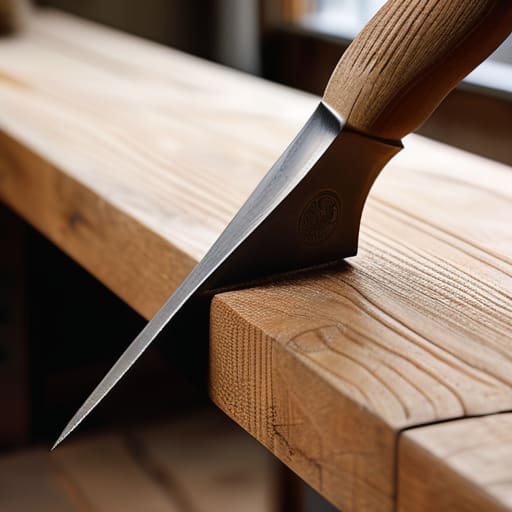
Now, don't go rushing into the local hardware store and buying every shiny, plastic-encased gadget they try to push on you. Most of those modern kits are designed to be replaced, not repaired, and that’s a waste of good money. If you’re looking into woodworking tools for beginners, my advice is to start with the basics that actually last: a decent bevel edge chisel, a solid mallet, and a reliable hand saw. You don't need a workshop full of corded noise to get this job done. A sharp chisel will give you a clean join on your timber that no sander can mimic, and it'll do it with half the fuss.
Once the woodwork is sorted, you have to think about the practical side of things. If you're planning on mounting coat racks on drywall, don't just trust a flimsy nail. A coat rack is only as good as what it's attached to, especially if you're hanging heavy winter coats. I always tell my students to invest in a good spirit level and a few proper wall anchors; it’s better to spend an extra ten minutes measuring and leveling coat racks now than to spend an hour fixing a crooked, sagging mess later.
Measuring and Leveling Coat Racks for a Perfect Fit
Once you’ve finished the joinery, the real test begins when you move from the workbench to the wall. I’ve seen too many fellas rush this bit, only to end up with a crooked rack that looks like it’s sliding off the house. When you're measuring and leveling coat racks, don't just trust your eyes; trust your level. I always take a moment to mark my height clearly with a sharp pencil—not a thick carpenter's marker that bleeds into the grain—so I know exactly where that horizontal line sits. If your rack is even a fraction of a degree off, it'll bother you every single time you walk through the door.
Now, if you aren't lucky enough to have a solid timber stud exactly where you want it, you'll be mounting coat racks on drywall. This is where most people go wrong. If you're planning on hanging heavy winter overcoats, don't go cheap with those flimsy plastic plugs that come in the box. You need to choose the right types of wall anchors for heavy coats, like toggle bolts, to ensure it doesn't rip straight out of the plaster. A sturdy installation is the difference between a useful piece of furniture and a pile of debris on the floor.
Five ways to keep your rack from being a scrap heap
- Don't go chasing the cheapest hardware at the local big-box store; if those hooks feel flimsy in your hand, they’ll pull right out of the timber once someone hangs a heavy winter coat on them.
- Treat your joinery with respect, because if you're just driving screws through the face of the wood, you’re making a piece of furniture that’ll wobble within a month.
- Sanding is a fine thing, but don't use it as a crutch for sloppy cutting; a sharp chisel will give you a clean, tight joint that no amount of grit and paper can ever truly fix.
- Check your grain direction before you start cutting or routing, otherwise you'll end up tearing the fibres and leaving yourself with a mess that looks more like a hack job than a proper piece of work.
- When it comes to the finish, less is more—apply it thin and even so you can actually feel the texture of the wood rather than feeling like you've wrapped your rack in a layer of cheap plastic.
Final Thoughts on a Job Well Done
At the end of the day, building a decent coat rack isn't about how much noise you can make in the workshop. It comes down to the basics we've covered: picking the right timber, taking the time to measure twice so you only cut once, and ensuring your mounting is level enough to actually hold a heavy winter coat. If you've followed these steps and kept your tools sharp, you haven't just assembled a piece of furniture; you've practiced the discipline of precision. Don't rush the finishing stages, and for heaven's sake, don't go reaching for a sander until you've checked that your joints are tight and your edges are clean.
There is a particular kind of satisfaction that comes from looking at a finished piece and knowing exactly where every shaving of wood came from. It’s a feeling you won't get from a mass-produced item bought off a shelf. When you use a tool you've maintained yourself, you aren't just working the wood; you're part of the process. My advice is simple: don't be in such a hurry to finish that you forget to enjoy the work. Build it right, maintain your edge, and let the quality of the join speak for itself. That is how a proper piece of joinery is made.