Using the Space Under the Stairs
 Callum Reith-Sowande
Most people think you need a shop full of expensive, battery-operated jigs and complex laser levels to figure out how to build storage under stairs. They spend a fortune on fancy cabinetry kits only to find the angles are a mess and the fit is nothing short of rubbish. I remember a job back in the nineties where a lad tried to rush a similar project using nothing but a circular saw and a prayer; the result was a series of gaps so wide you could park a van in them. He thought the power tools would save him time, but he spent three days fixing the mistakes he made in thirty minutes.
I’m not going to feed you any of that high-tech nonsense. In this guide, I’ll show you how to approach the task with a bit of patience and the right set of hand tools. We’ll go through the proper way to scribe your angles, how to select timber that won't warp on you, and how to ensure your joinery is built to last a lifetime. Forget the flashy gadgets; we’re going to focus on doing it right the first time.
Guide Overview
Tools & Supplies
- Circular saw or miter saw for cutting wood to size
- Power drill for assembling the frame and attaching drawers
- Tape measure for precise dimensions
- Level to ensure the base is even
- 2x4 lumber for the structural frame
- Plywood sheets for the shelving or drawer bottoms
- Wood screws (various lengths)
- Drawer slides or heavy-duty casters for mobility
- Sandpaper for smoothing edges
Step-by-Step Instructions
- 1. Before you even think about buying a single sheet of plywood, you need to get in there and map the slope. Don't trust a tape measure and a prayer; get yourself a decent level and a pencil to mark the stringer line directly onto the wall. I've seen too many lads try to build boxes that don't actually fit the angle of the stairs because they were too lazy to measure twice.
- 2. Once you've got your lines, it’s time to build your carcass frames. I prefer using a solid timber frame rather than trying to glue up thin carcasses. Use your square to ensure every corner is true; if your frame is out by even a degree, that gap at the bottom will drive you mad once you try to fit the doors.
- 3. Now, you’ll need to cut your base plates. This is where most people reach for a jigsaw and make a mess of the grain. If you want a clean, professional finish, use a fine-toothed handsaw and take your time. A steady hand and a sharp blade will give you a line that actually follows your mark, rather than a jagged edge that you have to spend an hour sanding away.
- 4. Next, you’ll be fixing your panels to the frames. If you're using veneered plywood, treat it with respect. Don't go hammering nails through the face like you're building a garden shed. Use a few well-placed screws from the inside of the frame to keep the surface clean and uninterrupted. It’s about the discipline of the join, not how much hardware you can cram into the wood.
- 5. For the doors, don't go buying those cheap, flimsy pre-made ones from the big-box stores. They’ll warp the moment the heating comes on. Build your own using the same timber as your frame. It takes longer, certainly, but a hand-built door will hang true for twenty years, whereas a cheap one will be sticking in the frame within six months.
- 6. Fitting the hinges is where the real work begins. If you're using butt hinges, make sure your mortises are deep and clean. I always say, a shallow mortise is a recipe for a sagging door. Use a sharp chisel to clear the waste in one or two clean passes; if you find yourself hacking away at the wood, your edge is too blunt and you're just making a mess.
- 7. Finally, once everything is hung, you need to check the alignment. If a door is catching, don't go grabbing a power sander to grind it down. That’s the amateur way. Instead, adjust your hinges or slightly shave the edge with a block plane. It’s a much more surgical approach, and it keeps the integrity of the wood intact.
The Art of Measuring for Under Stair Units Without Error
Most people approach measuring like they’re rushing to catch a bus, and that’s exactly how you end up with a gap wide enough to park a van in. When you're working with the awkward angles of a staircase, you can't just rely on a standard tape measure and hope for the best. I always tell my students: measure twice, cut once, but for under-stair work, I say measure three times and then check it again with a pencil. You aren't just dealing with straight lines; you're dealing with the slope of the stringer and the wonkiness of old floorboards. If you're planning custom pull out drawers, a mistake of even two millimetres at the bottom can mean the whole unit binds halfway up the slope.
Don't trust your eyes when it comes to those sloping ceilings. Use a sliding bevel to capture the actual angle of the stairs, then transfer that to your timber. If you're attempting a DIY under stair cupboard, you need to account for the thickness of your material and the clearance for your runners. I’ve seen too many lads build beautiful shelving only to find it won't slide into the nook because they forgot to account for the slightest bit of wall bulge. Get a scrap piece of timber and test your measurements physically before you commit to the final cut.
Crafting Custom Pull Out Drawers That Glide Like Silk
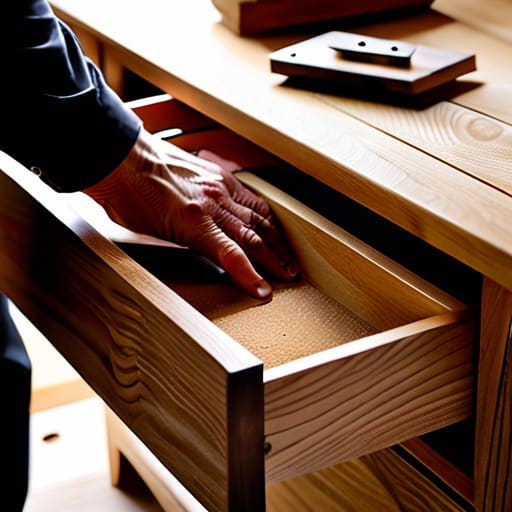
When you’re working with the awkward, tapering angles of a staircase, standard off-the-shelf runners often let you down. To get those custom pull out drawers moving properly, you can't rely on cheap, plastic-heavy hardware that'll bind the moment the house settles. I’ve always found that if you want a drawer to glide like silk, you need to prioritize the carcass stability first. If your frame is even a fraction out of square, no amount of high-end runners will save you from a sticking drawer. Build your internal boxes slightly undersized to allow for seasonal movement, and don't be afraid to use a hand plane to fine-tune the fit until it’s perfect.
Most people rushing through a DIY under stair cupboard try to force everything into place with a power driver, but that’s how you end up with gaps. Take your time with the joinery on the drawer fronts. A well-fitted, solid wood front adds the weight necessary to keep the movement smooth. If you’re looking for real space saving staircase solutions, focus on depth; deep drawers are much more useful than shallow shelves, provided you've got the clearance to pull them out fully without hitting the tread above.
Five things I’ve learned from forty years of fitting things where they shouldn't fit
- Don't trust the walls to be straight. In a house that old, the stairs will never be a perfect line, so build your carcasses slightly smaller and use a well-cut scribe to bridge the gap. It's better to have a bit of trim than a gap you can see from the street.
- Mind the weight. People think under-stair storage is just for shoes, but once you fill those drawers with heavy tools or books, the carcass will sag. Use proper hardwood runners or solid timber dividers; don't rely on those flimsy, pressed-wood bits they sell in the big shops.
- Plan for the dust. If you're working in a tight corner under a staircase, the dust gets trapped and stays there. I always leave a bit of breathing room behind the units for airflow, otherwise, you'll be dealing with damp or mould in a year's time.
- Stop reaching for the jigsaw for every little cut. When you're working in those awkward, sloping angles, a fine-toothed hand saw gives you the control you need. You'll spend less time sanding out mistakes if you get the cut right the first time.
- Invest in decent hinges. I've seen too many people spend weeks on beautiful joinery only to ruin the look with cheap, squeaky hardware that pulls itself out of the wood. Get proper, heavy-duty brass or steel hinges that you can actually maintain.
Putting the Pieces Together
At the end of the day, building under-stair storage isn't about buying a pre-made kit from a big-box store; it’s about the precision of your measurements and the quality of your joinery. We’ve covered how to map out those awkward angles without losing your mind, and how to ensure those drawers move with a smooth, silent glide rather than sticking halfway out. If you’ve taken the time to sharpen your chisels and set your planes properly, you’ll find that the wood responds to you. It’s the difference between forcing a fit and crafting a solution that actually belongs in the house.
Don't let the odd shapes and tight corners intimidate you. Most people see a wasted gap under a staircase and see a headache, but I see an opportunity to prove that patience beats speed every single time. You don't need a workshop full of expensive, vibrating power tools to get this right; you just need a steady hand and a blade that can actually hold an edge. Take your time, respect the grain, and build something that will still be working perfectly long after the cheap, flat-pack rubbish has been thrown in a skip.