Testing Whether Your Square Is Square
 Callum Reith-Sowande
I remember a lad back in my teaching days, a bright enough boy, but he spent three hours fighting a joint that wouldn't close because he was relying on a cheap, stamped-metal square he'd picked up for a few quid. He kept blaming his saw and his chisel, but the truth was simpler: his reference point was lying to him. Most people think you just walk into a shop, grab the shiny one in the box, and get to work, but if you don't know how to choose a square and check it properly, you're just measuring your mistakes before you've even made the cut. A tool that isn't true is worse than having no tool at all.
In this guide, I'm going to show you how to spot the rubbish from the reliable stuff so you don't waste your hard-earned money. I'll walk you through what to look for in a solid tool and, more importantly, how to use a known straight edge to verify it's actually square. No fancy gadgets or expensive nonsense—just the straight talk you need to ensure your work stays true.
Guide Overview
Tools & Supplies
- Combination Square (for measuring and marking)
- Machinist Square or Try Square (for precision checking)
- Thin piece of paper (to check for gaps)
- Flat surface or workbench (1 unit)
- Notebook and pen (1 unit)
Step-by-Step Instructions
- 1. First, you need to get your hands on the right kind of square for the job at hand. If you're doing fine joinery in the workshop, don't bother with those heavy, stamped steel squares you see in the big-box DIY stores; they're usually rubbish. Look for a solid brass or high-grade steel try square that has some heft to it. A tool that feels like a toy in your hand will never give you the precision you need when you're marking out a tenon.
- 2. Once you've got it, check the blade and the stock for any signs of warping. Lay the square on a known flat surface—a piece of granite or even a thick piece of glass works well—and see if it rocks. If it wobbles even a fraction, put it back on the shelf. A square that isn't flat is nothing more than an expensive piece of scrap metal, and I won't have it in my kit.
- 3. Now, you have to check the actual 90-degree angle, because manufacturers are far too lazy to ensure they're accurate. Take a piece of straight, seasoned timber and lay it on your bench. Press the stock of the square firmly against the timber, then look at the blade. If there's a gap between the blade and the wood, your square is already lying to you.
- 4. To be certain, I use the "flip test." This is a simple bit of logic that never fails. Align your square against a straight edge, mark a line, and then flip the square over so the stock is on the opposite side. If your line is still perfectly aligned with the blade, you've got a true square. If the line jumps or looks crooked, the tool is out of true and needs to be sent back or, if you're feeling ambitious, reground.
- 5. Don't forget to check the graduations. I've seen plenty of cheap squares where the lines are just printed on the surface, and after a few months of work, they start to rub off or become illegible. I prefer a tool where the measurements are etched or engraved into the metal. It's a small detail, but it's the difference between a tool that lasts a lifetime and one you'll be throwing in the bin by Christmas.
- 6. Finally, take a look at how the blade meets the stock. On a decent square, there should be no visible gap or play between the two parts. If you can wiggle the blade with your thumb, it's useless for anything more than rough framing. A proper tool should feel like one solid piece, providing a rigid, unmoving reference point every single time you use it.
Beyond Cheap Steel Selecting Precision Machinist Squares
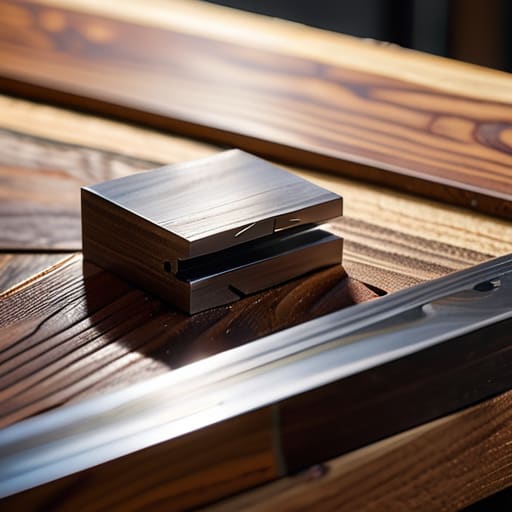
Now, if you’re moving past the basic layout work and getting into serious joinery or fine furniture, you need to stop looking at the hardware aisle and start looking at precision machinist squares. Most of what you’ll find in a general DIY shop is made of stamped steel that’ll warp the moment the humidity changes or you drop it once on a concrete floor. I’ve spent forty years seeing men struggle with wonky joints simply because they trusted a tool that wasn't built to stay true. A proper machinist square is ground to a much tighter tolerance, and while they cost more upfront, they aren't something you'll be throwing in the scrap bin in six months.
When you're working at that level, you aren't just eyeballing things anymore. You might find yourself verifying 90 degree angles using more advanced setups, perhaps even checking squareness with a dial indicator if you’re working on something truly critical like a machine base or a heavy timber frame. It sounds like overkill for a simple bookshelf, but once you've felt the difference between a tool that's "close enough" and one that's actually dead-on, you won't want to go back. Just remember: a tool is only as good as your ability to trust it.
Verifying 90 Degree Angles Before Your Project Fails
You don't want to find out your layout is off when you're halfway through a dovetail or, worse, when the carcass is already glued up. I’ve seen too many young lads trust a tool just because it looks shiny, only to realize their joints are opening up like a book. To avoid this, you need to stop relying on a single measurement. Instead of just checking one corner, use a method of repeated verification. Take your square, mark your line, then flip the square over to the opposite side of the timber. If your line isn't consistent, your tool is lying to you.
If you’re working on something that requires absolute precision, like a fine cabinet base, you might need to move beyond basic workshop tool maintenance and look at more technical approaches. While most of us are happy with a solid try-square, some of the more serious setups involve checking squareness with a dial indicator against a known flat surface. It’s a bit overkill for a garden shed, certainly, but when you're chasing perfection, it's the only way to be sure. Don't just assume your steel is true; make it prove itself before the glue hits the wood.
A Few Bits of Wisdom Before You Get To Work
- Don't just trust the markings on a cheap square; they're often nothing more than ink that'll rub off in a month. Check the actual metal edges for any nicks or burrs that'll throw your line off.
- If you're buying a new square, hold it up to a light. If you see light bleeding through where the blade meets the stock, that tool is lying to you, and it'll lead to nothing but wasted timber.
- Always keep a known straight edge in your kit. I don't care how expensive your square was; if you haven't checked it against something you know is true, you're just guessing.
- Stop buying those flimsy plastic ones for anything more than a rough layout. They warp the moment the temperature changes, and a warped square is worse than no square at all.
- Treat your square like a chisel. Keep the edges clean and don't go tossing it into a toolbox full of loose nails and heavy metal bits. If you don't respect the tool, it won't respect your joinery.
Final Thoughts Before You Cut
At the end of the day, choosing a square isn't about buying the most expensive kit in the catalog; it's about knowing what you're holding. You need to look past the shiny packaging and check the steel for straightness, ensure the edges aren't nicked, and—most importantly—never take a factory setting at face value. Whether you're using a simple try square or a heavy machinist model, you must verify that angle against a known straight edge before it ever touches your workpiece. If you don't take those ten minutes to check your tools now, you'll spend ten hours fixing mistakes later that could have been avoided.
I've seen too many young lads rush into a job with a wonky tool, only to end up frustrated when their joints don't close or their frames sit crooked. It’s a waste of good timber and a waste of your time. Remember, a workshop is only as reliable as the tools you maintain and trust. Take pride in your kit, keep your edges true, and respect the geometry of your work. If you treat your squares with a bit of care, they'll serve you for a lifetime, and you'll find that a bit of patience at the start makes for a much smoother finish in the end.