Running a Workshop Other People Use
 Callum Reith-Sowande
Most people think that if you want to start a maker space, you just need to buy a load of expensive, shiny power tools and plug them into a heavy-duty circuit. They’re dead wrong. I’ve seen community projects crumble in a month because they focused on the noise rather than the discipline. If you're trying to figure out how to set up a shared community workshop, you won't find much help from the catalogs selling you disposable gear that breaks the moment a real craftsman touches it. A proper workshop isn't a showroom; it’s a living, breathing space that requires a foundation of shared respect and, more importantly, a collection of tools that actually work.
I’m going to skip the fluff and the high-tech nonsense you see in those glossy magazines. Instead, I’ll show you how to build a space that lasts by focusing on the fundamentals: smart layout, sensible tool selection, and the kind of maintenance routines that keep a blade sharp and a project on track. We’ll talk about how to manage the people as much as the machines, ensuring your workshop becomes a place of precision and craft rather than a graveyard of broken bits and broken promises.
Guide Overview
Tools & Supplies
- Heavy-duty workbenches for stable assembly surfaces
- Safety equipment including eye protection and ventilation systems
- Inventory management software for tool tracking and booking
- Liability insurance policies for community coverage
- Safety signage and workshop rule documentation
- Storage shelving units for organized tool access
Step-by-Step Instructions
- 1. First, you need to sort the floor from the ceiling. Before you buy a single bench, you have to decide if this is a place for heavy-duty timber framing or a space for fine furniture and repairs. I’ve seen too many community spaces try to be everything to everyone, and they end up being nothing to anyone. Get your group in a room, sit down, and agree on the primary purpose. If you don't have a clear focus, you'll spend your entire budget on machines that sit idle half the time.
- 2. Next, get your benches right. You can have the most expensive table saw in the county, but it’s useless if the person using it doesn't have a solid, flat surface to work on. I always tell my students that a good workbench is the foundation of everything. Look for heavy, stable benches that won't slide when you're planing a board or mortising a joint. If you're starting on a budget, find some old, thick timber and build them yourselves; it’s better for the soul and the wallet.
- 3. Establish a strict tool policy, and I mean strictly. In a shared space, the biggest threat isn't a lack of tools, it's the loss of quality through neglect. I won't own a tool I can't repair, and I expect the same from a workshop. You need a system where every tool has a home and a clear sign of its condition. If a chisel is left out with a nick in the edge, it needs to be flagged immediately. Don't let the "use it and leave it" mentality turn your workshop into a graveyard of blunt, useless scrap.
- 4. Set up a dedicated sharpening station. This is where most community workshops fail. They buy a dozen sets of chisels and saws, and six months later, everything is dull and frustrating to use. You need a proper area with stones, honing guides, and plenty of light. Make it a rule that sharpening is part of the job, not an afterthought. If people aren't willing to take the time to maintain their edges, they shouldn't be using the tools in the first place.
- 5. Organize your consumables with a bit of common sense. It’s easy to get carried away buying every type of glue and sandpaper under the sun, but you need to keep it simple. Create a clear, visible system for how people access the basics—sandpaper, glue, saw blades, and drill bits. If it’s a mess, people will just grab whatever is closest, and you'll find yourself running out of the essentials just when a project gets serious.
- 6. Finally, write down the rules of the house. This shouldn't be a thick manual that no one reads; it should be a few plain, direct instructions posted where everyone can see them. Things like cleaning up your shavings, reporting broken tools, and—most importantly—respecting the machines. A workshop is a shared responsibility, not a personal playground. If you can't respect the tools and the people using them, you have no business being in the shop.
Mastering Community Tool Library Management and Organization
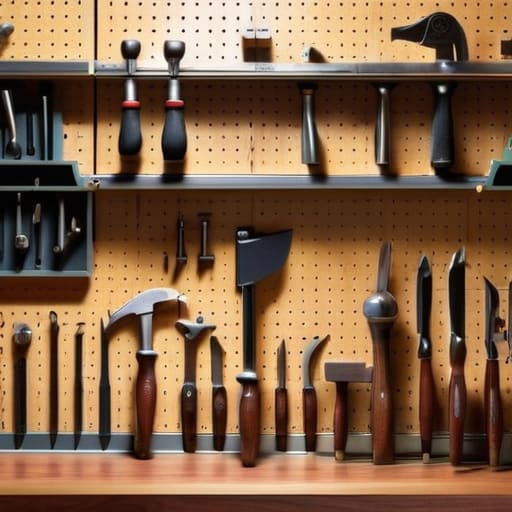
When you’re managing a shared space, you can’t treat tools like they’re disposable. In a private shop, if I leave a chisel on the bench, I know it’s being looked after. In a community setting, you need a strict workshop equipment maintenance schedule to ensure the next person isn't fighting a dull edge or a seized bearing. I’ve seen too many projects ruined because someone borrowed a plane and returned it with a nicked blade. You need a system where every tool is inspected before it goes back on the rack; otherwise, you aren't running a workshop, you're just managing a pile of junk.
Organization isn't just about tidy shadows on a pegboard, though that helps. Effective community tool library management relies on clear accountability. I always suggest a simple sign-out sheet or a digital log. If a member knows they are responsible for the condition of a specific tool, they’ll treat it with a bit more respect. It’s about building a culture where people value the tool's longevity as much as the finished piece of timber.
Drafting Workshop Liability Waivers and Safety Protocols

Now, I’m not a lawyer, and I wouldn’t suggest you try to wing the legal side of things. But if you’re opening a space where people are using saws and chisels, you can’t just rely on a handshake and a smile. You need proper workshop liability waivers that everyone signs before they even touch a bench. It’s not about being difficult; it’s about making sure everyone understands that a tool, no matter how well-maintained, carries inherent risks. If someone decides to use a plane like a hammer, you need to have your paperwork in order to protect the collective.
Beyond the legalities, you have to get serious about your workshop safety protocols. I’ve spent forty years seeing what happens when a man gets complacent with a sharp edge. Don't just print a list of rules and stick them on a wall where they'll gather dust. You need to bake safety into the culture of the shop. This means mandatory inductions for every new member and clear, written instructions for the heavy machinery. If a person can't demonstrate they know how to respect the tool, they shouldn't be allowed to use it. Safety isn't a chore; it's the foundation of a working shop.
Five Rules to Keep the Workshop from Turning into a Scrapyard
- Establish a strict "sharpness standard" for shared tools. If someone borrows a chisel and brings it back with a nicked edge or a rounded tip, they shouldn't just be asked to fix it; they need to be shown how. In a community space, a dull tool is a dangerous tool, and I won't have people hacking away at timber like they're using a spoon.
- Don't let the power tool hoarders take over. It’s easy to let a workshop become a collection of loud, dusty machines that everyone uses once and then leaves for someone else to clean. Make sure your layout prioritizes bench space for handwork. If you don't carve out a quiet corner for precision, you'll end up with a room full of people making rough cuts and nothing more.
- Implement a "one-in, one-out" rule for consumables. A community workshop can bleed money fast if you're constantly replacing sandpaper, glue, or blades that people treat like they're free. Set a clear system for how supplies are used so the workshop doesn't go broke just because someone couldn't be bothered to bring their own scrap wood.
- Create a dedicated station for tool maintenance. You can't expect people to respect the kit if there isn't a proper place to care for it. Set up a sturdy bench with good lighting, a selection of whetstones, and a decent vice. If you make maintenance easy and accessible, people are far more likely to keep the tools in working order.
- Appoint a "Tool Warden" who actually knows their trade. You don't need a manager with a clipboard; you need someone who can tell the difference between a good bevel and a botched one. This person shouldn't be a policeman, but a mentor—someone who can step in when a member is struggling with a tool before they ruin the steel or the workpiece.
Getting the Grain Right

Setting up a space like this isn't just about buying a few benches and a rack of saws; it’s about the groundwork you do before the first person even walks through the door. You’ve looked at the logistics of tool libraries, you’ve sorted out the paperwork to keep everyone safe, and you’ve figured out how to keep the chaos at bay through proper organization. If you get the management and the safety protocols right from the start, you aren't just building a shed; you are building a reliable system that can actually withstand the wear and tear of daily use. It’s much easier to maintain a standard of excellence than it is to try and fix a broken culture once the tools start going missing and the safety rules are being ignored.
At the end of the day, a community workshop is a living thing, much like a piece of seasoned timber. It needs care, it needs respect, and it needs people who understand that quality matters more than speed. Don't get discouraged if the first few months feel a bit rough around the edges. Just keep your tools sharp, your rules clear, and your eyes on the work. If you build this place on a foundation of respect for the craft, you’ll find that the real value isn't in the machines you own, but in the skills and the community that grow alongside them.