A Cold Frame From Reclaimed Timber
 Callum Reith-Sowande
Most people think you need a shed full of expensive power tools and a pile of pressure-treated timber to get started, but that's a load of rubbish. I spent forty years on sites seeing men struggle with heavy machinery only to end up with wonky joints and wasted wood. When it comes to learning how to build a cold frame, the secret isn't in the complexity of your kit; it's in the quality of your edges. I remember my first attempt back in the seventies, using a blunt handsaw that tore through the wood like a dull spoon through porridge. I learned then that if you respect the grain and keep your tools keen, the work practically does itself.
In this guide, I’m going to show you how to construct a sturdy, reliable frame using simple joinery that will last for seasons. I won't be wasting your time with fancy gadgets or unnecessary steps that only serve to thin your wallet. Instead, I'll walk you through selecting the right timber, making precise cuts with hand tools, and assembling a structure that actually holds heat. We’re going to do this properly, the old-fashioned way.
Guide Overview
Tools & Supplies
- Measuring tape for marking wood lengths
- Handsaw or miter saw for cutting lumber
- Drill with bits for pilot holes and screws
- Screwdriver or drill driver for assembly
- Untreated cedar or pine boards (approx. 10-15 linear feet)
- Clear plexiglass or heavy-duty polyethylene sheeting (1 sheet)
- Exterior grade wood screws (1 box)
- Wood glue (optional, waterproof)
- Hinges (2 units for the lid)
Step-by-Step Instructions
- 1. First, you need to pick your timber. Don't go buying some flimsy, pressure-treated rubbish from a big-box retailer that’ll rot in three seasons. I prefer using larch or cedar; they have a natural resilience to the damp that you just can't beat. Get your pieces cut to size for your frame, but don't rush the joinery. If you’re using a hand saw, make sure it's actually biting into the wood rather than just scratching the surface.
- 2. Once you've got your lengths, it's time to assemble the base frame. I like to use simple butt joints for a cold frame, as it's not a piece of fine cabinetry, but I still insist on a square layout. Use a decent framing square and check your corners twice. If your frame is even slightly out of true, that glass lid you're about to buy will never sit flush, and you'll be losing all your precious heat through the gaps.
- 3. Now, you'll need to attach some cleats or a small rebate along the inside of the top rails. This is where a sharp chisel comes in handy. I don't bother with fancy routers; I just score a line and pare away the waste until I have a clean seat for the glass. If you try to force a piece of glass into a rough-cut groove, you'll end up with a handful of shards and a very frustrated afternoon.
- 4. Before you even think about the glass, secure the base to the ground. You can use some simple wooden stakes or even a few heavy bricks to keep it from blowing over in a spring gale. I always suggest making sure the ground is level first. If the base is sitting on a slope, your frame will twist, and no amount of sealant is going to fix a structural lean.
- 5. For the lid, you can either build a separate wooden frame or use a single sheet of toughened glass. If you're building a frame, treat it exactly like the base but perhaps a bit lighter. I find that using small hinges on one side allows you to prop the lid open on sunny days, which is vital for preventing your seedlings from cooking in their own microclimate.
- 6. The final step is the glazing. If you're using glass, apply a thin bead of silicone or a bit of putty along the rebate you cut earlier. Don't go overboard; you just want a weather-tight seal. Once the glass is in, give the whole thing a quick wipe down. A clean frame lets the light in, and in a cold frame, light is everything.
Mastering Your Cold Frame Materials List
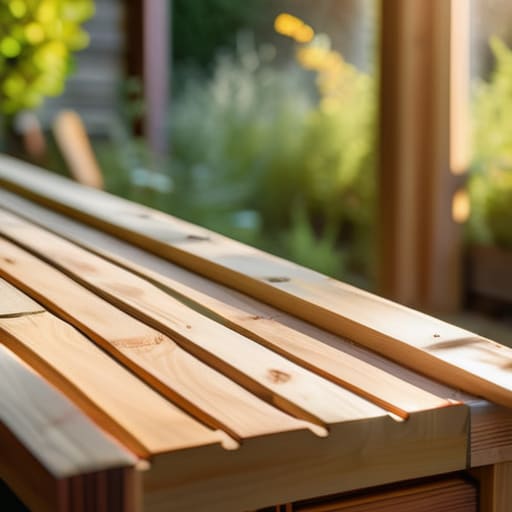
When you sit down to look over your cold frame materials list, don't just grab the first bit of scrap timber you find in the shed. I’ve spent forty years seeing how rot sets in when people use cheap, untreated softwood for outdoor structures. If you want this to last more than one season, you need timber that can stand up to the damp. I prefer larch or cedar; they have a natural resilience that means you won't be out there repairing structural joints every time the weather turns. A frame is only as good as the wood it's built from, and a sturdy base is the foundation for proper garden microclimate control.
Don't get caught out by the glazing, either. Most folks think any old sheet of glass will do, but for protecting seedlings from frost, you want something clear and sturdy. If you can find some reclaimed single-pane glass, use it. It’s thicker and holds the heat better than those flimsy polycarbonate sheets that crack the moment a hard freeze hits. You aren't just building a box; you're building a tool for extending the growing season, so treat your materials with the same respect you'd give a fine piece of oak.
Garden Microclimate Control Through Intentional Design
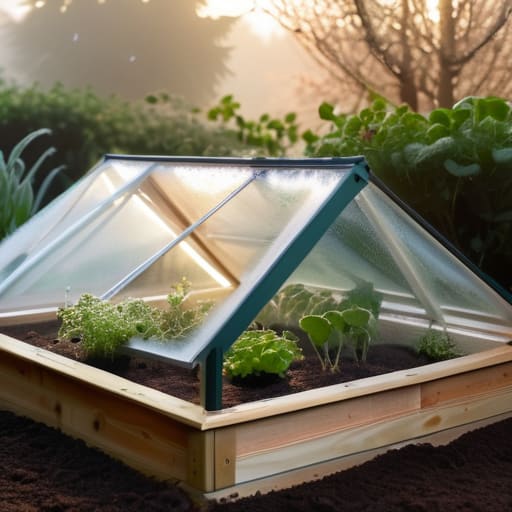
Building a structure is only half the battle; the real work lies in how you manage the air inside it. If you just slap some timber together and walk away, you’ve built a box, not a tool. To get any real benefit from garden microclimate control, you need to think about airflow and heat retention. I always tell my former students that a cold frame is a living thing. If it gets too stuffy, you’ll cook your plants; if it’s too drafty, the frost will take them before lunch. You need to be able to crack that lid open on a sunny afternoon to let the heat escape.
When it comes to protecting seedlings from frost, placement is just as important as the build itself. I like to tuck mine against a south-facing brick wall. That masonry acts like a thermal battery, soaking up the sun's heat during the day and bleeding it back into the frame once the sun goes down. It’s a simple bit of physics that makes extending the growing season much easier without needing to buy expensive heaters or fancy gadgets. Just keep an eye on the temperature, and let the design do the heavy lifting.
Five Bits of Wisdom Before You Start Cutting
- Don't go buying cheap, pressure-treated timber just because it's on sale at the big-box store. It’s full of chemicals that’ll leach into your soil, and more importantly, it’s often soft and splintery. Find some decent, rot-resistant larch or cedar. If you can't trust the wood to hold a screw, don't bother building with it.
- Check your glazing before you build the frame. I’ve seen too many lads build a perfectly square box only to find their old glass panes are warped or the wrong size. Measure your glass first, then build the frame to fit the glass, not the other way around. It saves you a lot of headache and wasted timber.
- Keep your joints tight. A cold frame is meant to trap heat, not let the wind whistle through every gap. I don't care if you're using screws or joinery, just make sure those corners are square and snug. If you've got gaps, you're just building a very expensive breeze block.
- Make sure the lid moves well. If you're struggling to lift a heavy, stuck lid, you won't bother opening it to vent the plants when the sun gets too high. Use proper hinges—not those flimsy plastic bits—and make sure they're seated deep enough in the wood so they won't pull out when the weather turns.
- Use a sharp chisel to clean up your end grain. When you're fitting your frame pieces together, don't try to force a blunt tool through the wood; you'll just crush the fibres and end up with a sloppy, weak joint. A clean, crisp cut makes for a sturdy frame that'll last more than one season.
A Bit of Final Advice

Building a cold frame isn't about buying the most expensive cedar or the fanciest polycarbonate sheets you can find at the big-box stores. It comes down to the basics: choosing timber that won't rot the moment the rain hits it, ensuring your joints are tight, and setting up a structure that actually controls the environment rather than just sitting there looking pretty. If you’ve followed the steps, you’ve got a solid frame that respects the principles of airflow and heat retention. Just remember that a well-built box is only as good as the care you put into the assembly; if the edges aren't true, the weather will find its way in eventually.
Once the last screw is in and the glazing is set, don't just walk away and call it a job done. A cold frame is a living thing, much like the tools I’ve spent my life maintaining. It requires a steady eye and a bit of regular adjustment as the seasons shift. There is a particular kind of satisfaction in watching a seedling thrive under a roof you built with your own two hands, especially when you know that structure was made to last. Take pride in the work, keep your tools sharp, and trust the process. You aren't just building a box; you're building a way to extend the season.